
With the right tools and guidance, Mobile App Development is a piece of cake, whether it’s for amateurs or professionals for personal or business needs. Have a working app in more than a week’s time, by following the steps below:
Day 1: Looking for problems that your app can solve
Your app should have value in day to day life, making people’s tasks easier. For example the most popular app is the Covid-19 app that has become an essential nowadays and there is room for the same kinds of apps with different functionalities. Coming up with innovative app ideas that users can implement in their day to day lives is the key to getting started, keeping in mind about your target audience.
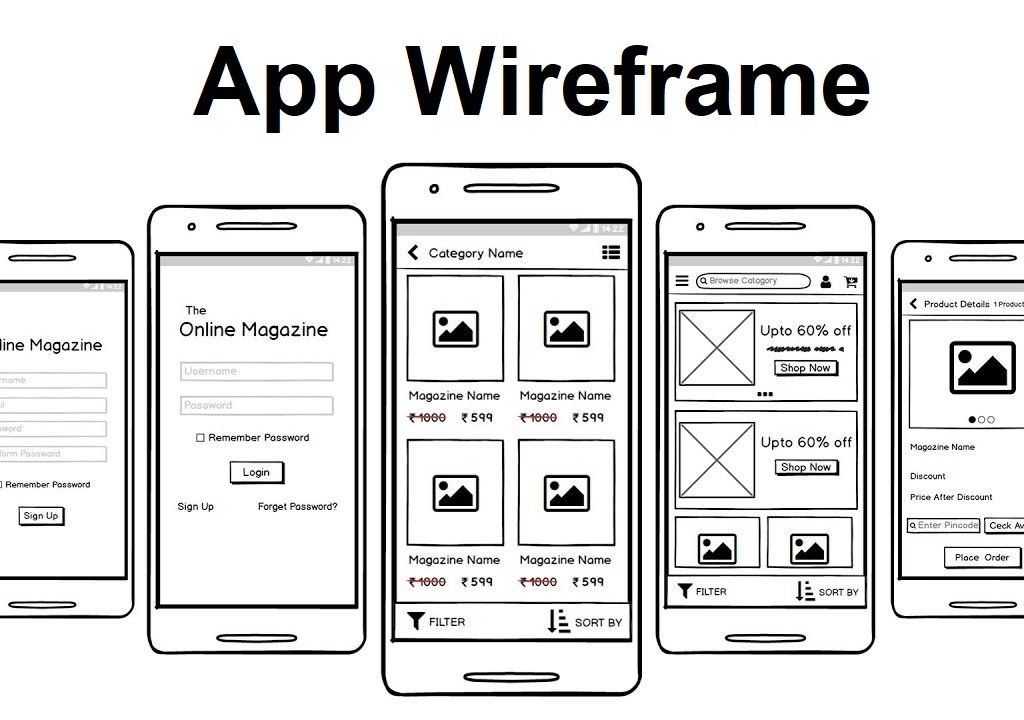
Day 2: Get your plan on paper using wireframe
Create a rough sketch on how your app screen needs to be, with all the graphical features and options that you have imagined. This gives clarity on how your app needs to be designed. It helps to get a flow and to keep check on the developments in the designing phase.
Day 3: Choosing the Development Environment
The environment is where you do all your coding for the app. It is called the ‘Integrated development Environment’, IDE. Mobile App Development require downloading of Android Studio and Java and Android SDK which is fairly easy to begin with clear user instructions available online.
Day 4: Keeping a day to get around Java would help
Get familiar with the basics of programming like variables, classes and conditional statements. There are numerous java basic tutorials online that can help the reader to catch up.
Day 5: Getting your Images
Figuring out the appropriate images and gathering them would be the next step. Free Image editing tools like Adobe and Illustrator would be best choices to edit images.
Day 6: Using Android Designer to create your layout
This tool allows you to drag and drop the frames or widgets to the pages. Let’s keep the app as simple as possible with one or two pages. Start a new project in the Android Studio; select File-> New->New Project. You need to follow the steps leading to selecting ‘Empty Activity’. This will launch the designer mode of the Android studio.
Day 7: Writing the Java Code
Knowing the basics of java will come in handy in this step. Catching up with java resources online like ‘Build an Android App’ is recommended. Here you will get a clear way of going around with operations, variables and button clicks. A debug APK or AVD (Android Virtual Device) Manager is needed to test the code.
Day 8: Make sure the functionalities are working
Look for codes to make the Text Boxes, Buttons, animations work. Google on the internet with keywords ‘Android Studio Play MP3 on click” to get the corresponding code. Make sure you get all your functionalities running this day.
Day 9: Testing
Your app is ready with all the required elements. Even though it is an amateur representation, it is worth testing it thoroughly, maybe your close friends and family can help you with this.
Day 10: Publish your app
Create a new APK that users will download to use your app. Go to this link ‘Sign your app’. This ensures that only you can update your mobile application. Use this link to ‘ Build and run your app’ which lets you publish your app.